Renovating a home can be one of the most rewarding and stressful projects you’ll ever take on.
You spend months – sometimes years – picking paint samples, knocking down walls, and working late into the night over design choices. Yet when it’s all said and done, those memories tend to blur together. That’s where a renovation photobook comes in.
A well-crafted photobook doesn’t just document the before-and-after transformation; it tells the story of how your house became a home. It’s both a visual diary and a lasting keepsake. Even if you’re not “a photo person,” you probably have dozens – if not hundreds – of snapshots sitting in your phone or cloud storage. So why not turn them into something tangible that you’ll actually enjoy revisiting?
If you’re curious (or skeptical) about how to do it and why it matters, this guide is here to help.
Why Make a Renovation Photobook?
First off, you might be wondering: is it really worth the effort to create a photobook around your renovation?
Here’s the thing – your renovation wasn’t just a project. It was an emotional, financial, and time-intensive journey. A photobook captures that entire experience in a way that social media posts or cloud folders simply can’t.
Some of the best reasons to create one include:
- Celebrating Progress: It gives you a way to appreciate how far you’ve come from the “before” photos.
- Preserving Memories: You’ll remember not just the outcome, but the process – the demo days, the design debates, the little victories.
- Sharing the Story: Friends and family often ask, “What did it look like before?” A photobook answers that question beautifully.
- Inspiring Others: If you ever plan to sell, rent, or blog about your home, the book becomes a marketing asset as much as a personal keepsake.
Think of it as the final flourish to your renovation experience – just as important as hanging the last picture frame on the wall.
Getting Started: What to Include in Your Home Renovation Photobook
You don’t need to be a photographer or designer to make a compelling book. You just need the right content and a clear story.
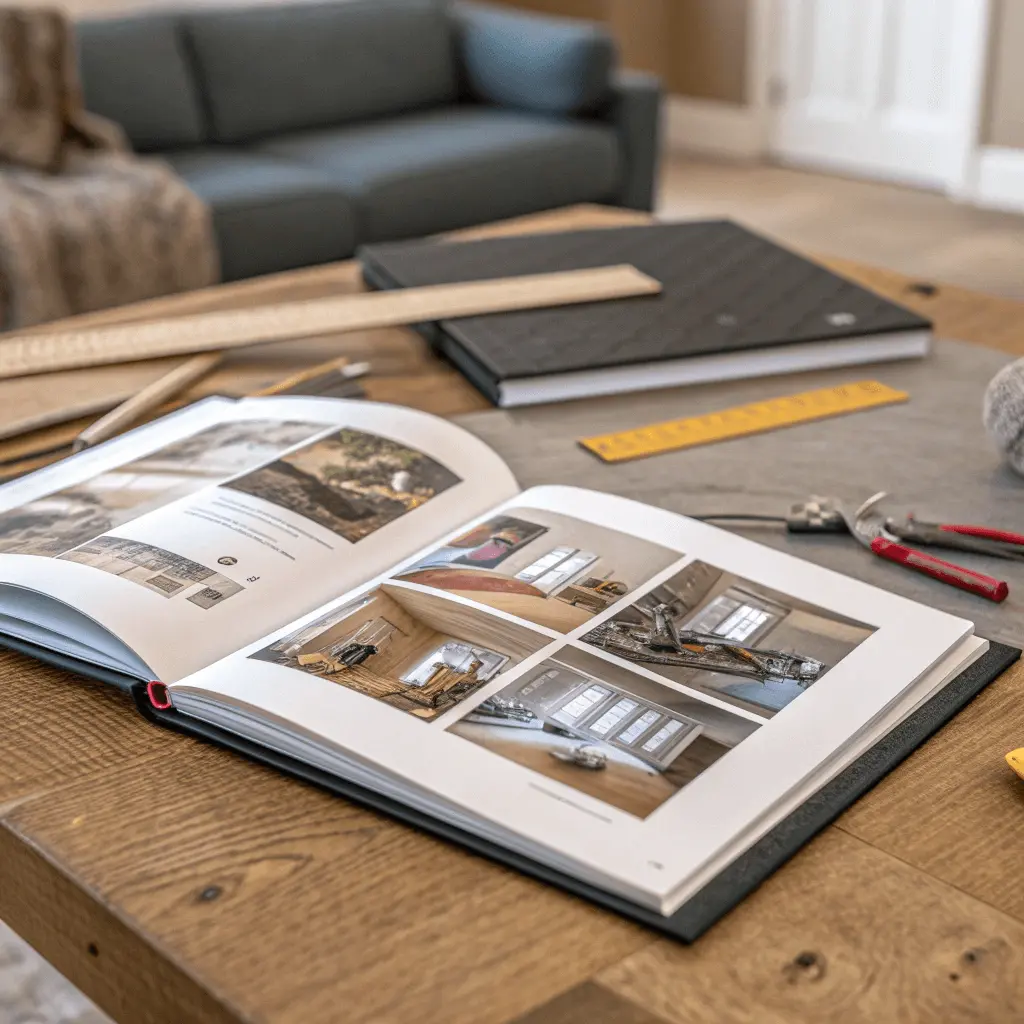
1. Photos From All Stages
To tell a full story, start with the very beginning. That means:
- Before shots: Think cluttered corners or outdated finishes—not “pretty” photos but ones that show where you started.
- During photos: Candid moments of demolition, construction progress, tools strewn across the floor. These bring your journey to life.
- After images: The final reveal. Bright, clean, and styled to showcase the finished result.
Pro tip: Try to take pictures from similar angles throughout so that the transformation is easier to see page-by-page.
2. Key Design Decisions
Renovations involve a hundred tiny decisions and a few major ones. Use your photobook to spotlight the big calls: choosing the tile, finalizing the layout, or customizing cabinetry. You might also work in some sketches or planning screenshots if you have them.
Pair these with short captions that explain your choices—just enough to provide context, not so much that it feels like a journal.
3. Unexpected Moments
No project goes exactly to plan. Capture those moments too—the day the wrong countertop arrived, or when your kids painted a mural on the hallway floor “to help.” These unscripted events add character to your story and make the end result feel hard-earned and personal.
4. Room-by-Room Storytelling
One of the most effective ways to organize a renovation photobook is by room. Each space gets its own mini-chapter:
- Kitchen before/during/after
- Bathroom transformation
- Living room layout updates
- Outdoor space upgrades
This lets you highlight the unique decisions and challenges of each space without confusing the reader.
Choosing the Right Photobook Platform
There are plenty of tools online that let you create photo albums, but for a renovation project, look for platforms that offer:
- High-quality, lay-flat printing (great for before/after comparisons)
- Minimal or modern templates that suit interior design themes
- Durable finishes, because this is something you’ll want to thumb through for years
One solid recommendation for beautiful, purpose-built options is exploring new home photo albums. These are designed with milestones like renovations in mind, and they offer templates that work especially well for visual storytelling.
How to Organize Your Photobook for Maximum Impact
A good photobook doesn’t just dump all your photos into a single timeline. It takes the viewer on a journey.
Use a Narrative Arc
Start with a few sentences or a spread introducing the “why” behind your renovation. Were you tackling a fixer-upper? Expanding for a growing family?
Then move into the build-up (before photos), show the messy middle (in-progress work), and end on the big reveal (after shots and styled images).
This flow mirrors the emotional journey of renovation and adds storytelling structure.
Mix Images With Captions and Short Notes
You don’t need long paragraphs. Short captions or notes like:
- “This was the kitchen before we removed the wall.”
- “We spent two weeks debating between white oak and walnut.”
- “Found this tile on clearance – best last-minute decision we made!”
These little details make your story feel authentic and allow your personality to shine through.
Leave White Space
Don’t feel the need to fill every available inch. Strategic spacing and full-bleed images can elevate the overall design and give the reader’s eye room to breathe.
Tips for Taking Share-Worthy ‘After’ Photos
Once the dust settles and your home is finally presentable, take some time to properly shoot the final look. These “after” photos will shine as the highlight of your photobook.
Here’s how to make them count:
- Use natural light wherever possible.
- Clean and declutter before shooting.
- Shoot from corners to capture more of the room.
- Add small touches like fresh flowers or folded towels to warm up the space.
A few well-composed, high-resolution photos can really elevate the feel of your book.
Don’t Rush the Process
Creating the photobook should feel like a fun, reflective experience—not another item on your to-do list. You’ll probably find that as you sift through your photos, the emotions of the renovation come flooding back. That’s part of the value.
Give yourself some time to pull together all the pieces. Get input from family members or your partner. Even better, work on it together. It’s a great way to reconnect over everything you’ve accomplished.
Conclusion: Make It a Tradition
Your first renovation photobook won’t be perfect—and that’s okay. What matters most is that you’ve captured a once-in-a-lifetime experience in a way you can revisit and share.
Consider making photobooks a tradition for other milestones, too. Whether it’s a second home, a garden build, or a nursery makeover, having printed memories adds meaning to the work you’ve put in.
Start small, tell the truth of your journey, and design something that reflects both progress and pride. You’ve invested a lot in your home—now invest a little in remembering how you got there.
And don’t be surprised if flipping through your photobook inspires your next project.